
Tool Sharpening: Why It’s the Most Important Skill You’ll Learn
If there’s one skill that transforms your woodturning more than any other, it isn’t learning to turn beads, cut coves or hollow bowls. In fact, mastering Woodturning Tool Sharpening is what truly elevates your work.
It’s learning to sharpen your tools properly.
Many beginners assume poor results are caused by a lack of experience, when in reality they’re often fighting against blunt tools. Even experienced turners know that a freshly sharpened tool can completely change how enjoyable turning feels.
Whether you’re just starting out or have been turning for years, understanding woodturning tool sharpening will make your turning safer, easier and more enjoyable.
Why Sharp Tools Matter
A sharp cutting edge slices cleanly through wood fibres.
A blunt edge tears and scrapes instead.
That single difference affects almost every part of the turning process:
- Cleaner cuts
- Better surface finish
- Less sanding
- Greater control
- Reduced catches
- Less effort
- Safer turning
Many people are surprised to discover that sharpening every 10–20 minutes during bowl turning isn’t excessive—it’s completely normal. Professional turners often sharpen even more frequently because it keeps the tool performing at its best.
The Biggest Myth About Sharpening
One of the biggest misconceptions is that sharpening removes too much steel.
In reality, light, regular sharpening removes very little metal.
Leaving a tool until it’s completely blunt often means spending far longer at the grinder, removing much more steel to recreate the bevel.
Think of it like keeping a kitchen knife sharp. Regular maintenance is quicker and preserves the tool for longer.
Signs Your Tool Needs Sharpening
You don’t need to wait until the tool stops cutting completely.
Look for these warning signs:
- You’re creating dust instead of shavings.
- The tool needs noticeably more force.
- The surface becomes rougher.
- The tool starts bouncing or chattering.
- The cutting edge feels hot.
- The cut becomes noisy.
When you notice these signs, it’s time to sharpen.
Consistency Is More Important Than Perfection
Many new turners become obsessed with finding the “perfect” bevel angle.
The truth is that consistency matters far more.
Using the same angle every time builds muscle memory and produces predictable cuts.
Some commonly used starting angles include:
| Tool | Typical Bevel Angle |
|---|---|
| Roughing Gouge | 45° |
| Spindle Gouge | 30–35° |
| Bowl Gouge | 45–60° |
| Parting Tool | 30–35° |
| Round or Square Scraper | 80° |
| Skew Chisel | 20° each side (40° included angle) |
These are excellent starting points, but as your experience grows you’ll naturally make small adjustments to suit your turning style.
How to Check the Sharpening Angle of Your Woodturning Tools
One of the questions I’m asked most often is, “How do I know what angle my tools are already ground to?”
The good news is that you don’t need expensive equipment to find out. Whether you’re buying second-hand tools, inheriting someone else’s sharpening setup, or simply can’t remember your current bevel angles, there are several easy ways to check.
Use a Dedicated Angle Checker (Recommended)
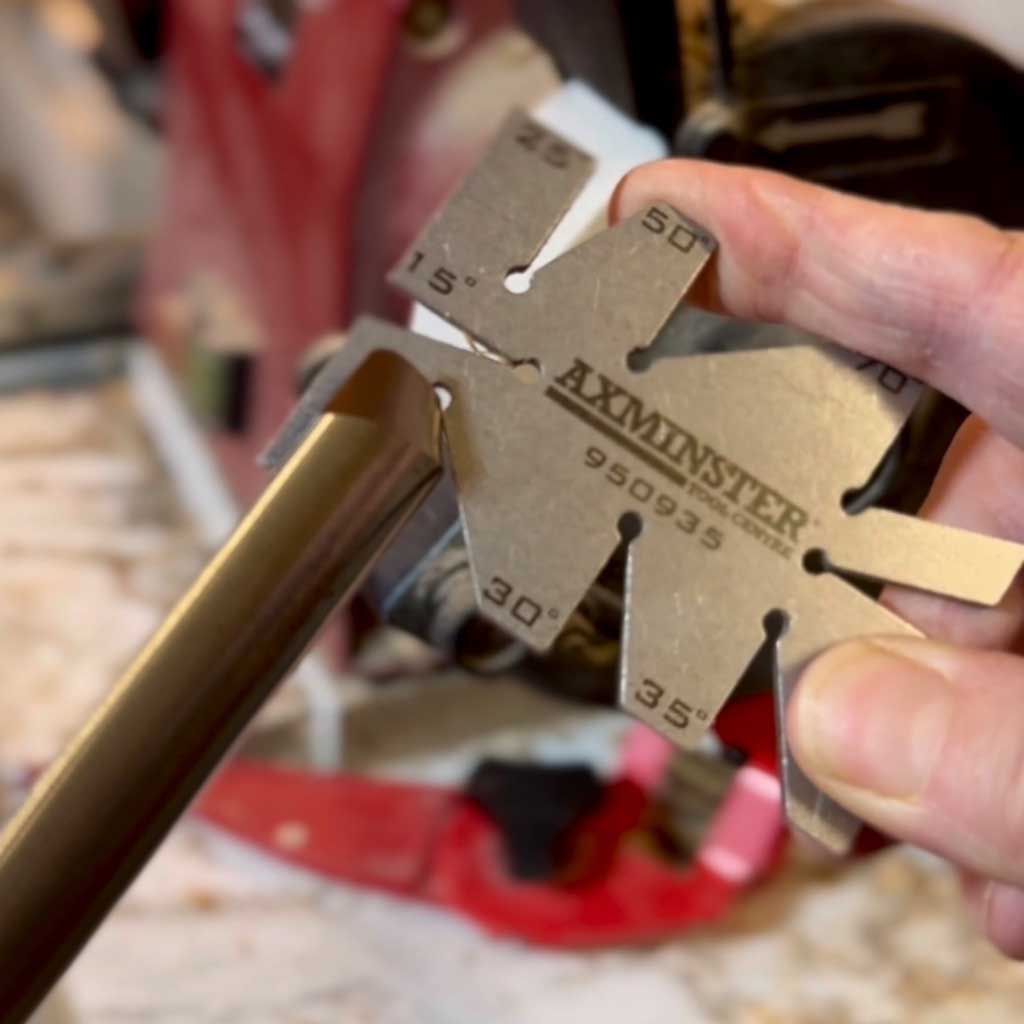
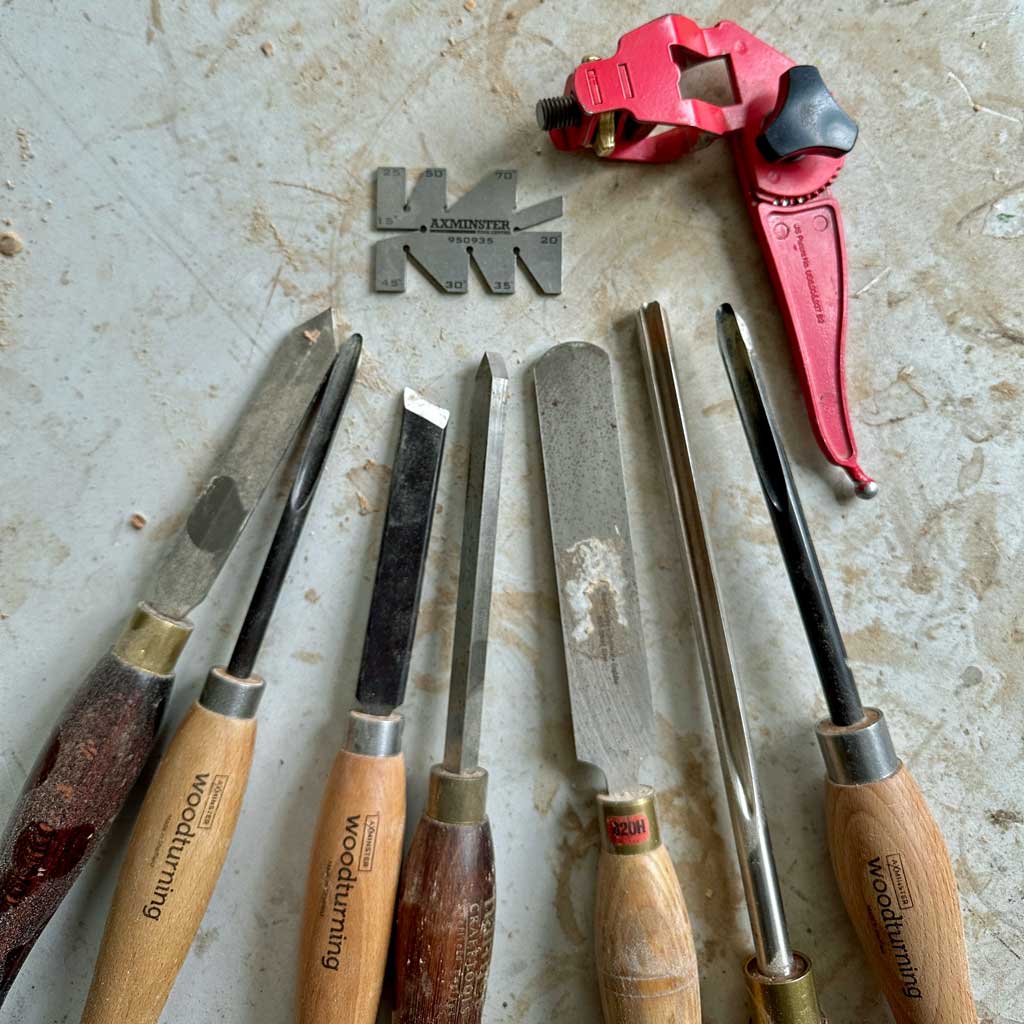
The quickest and most accurate method is to use a purpose-made angle checker. These inexpensive gauges are available in a range of common woodturning angles and simply rest against the tool’s bevel.
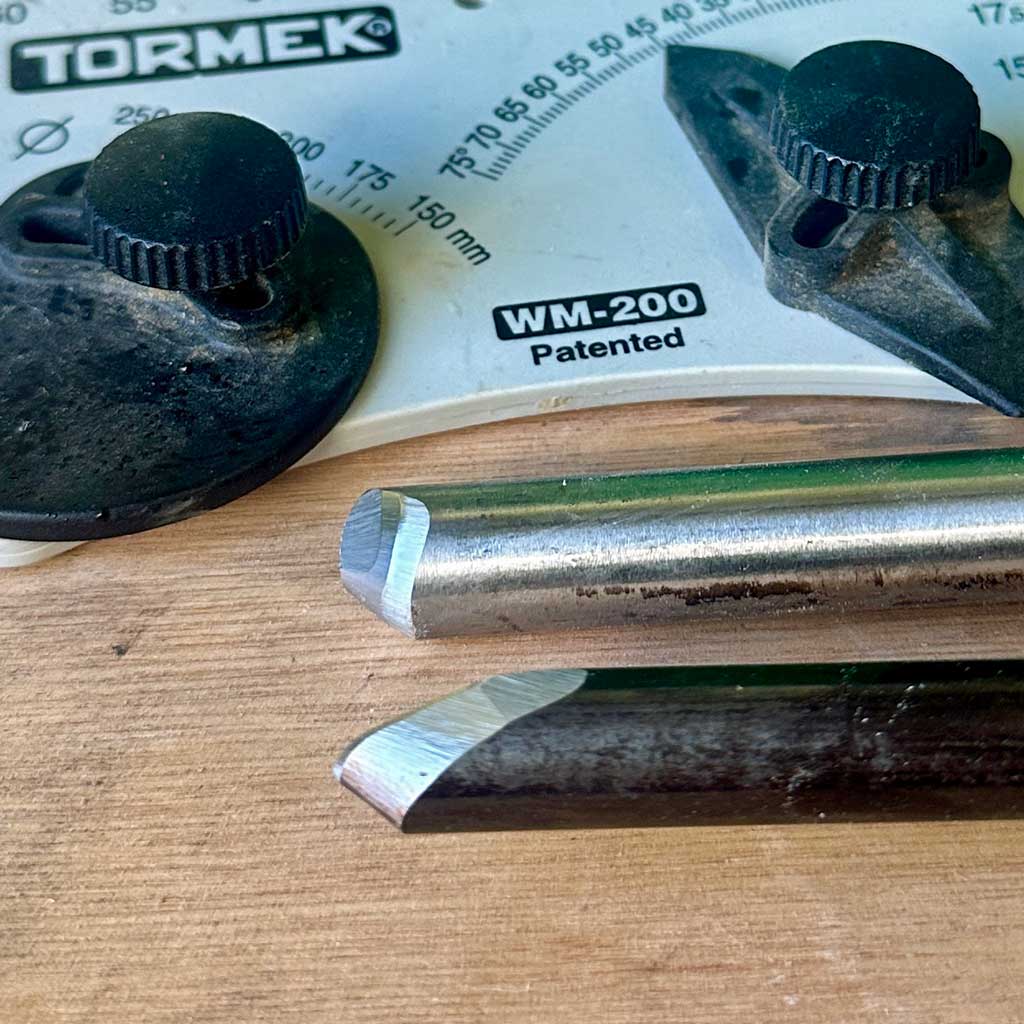
Place the angle checker against the bevel and hold it up to a light source. If the bevel sits flush against the gauge with no gaps, you’ve found the angle. If there’s a gap at either the cutting edge or the heel of the bevel, try another angle until you find the closest match.
This is by far the easiest method and is particularly useful when setting up your grinder or reproducing an existing grind consistently.
Use a Protractor
If you don’t own an angle checker, an ordinary school protractor works surprisingly well.
Lay the tool flat on a bench and align the centre of the protractor with the cutting edge. Measure the angle between the bevel and the centre line of the tool. For skews, remember that the bevel angle is measured on each side individually (for example, around 20° per side gives a 40° included angle).
While a protractor isn’t quite as convenient as a dedicated angle gauge, it’s accurate enough for most woodturners.
Use the Marker Pen Method
A simple black permanent marker can tell you a great deal.
Colour the entire bevel with a marker pen, then lightly touch the tool to your grinding wheel without switching the grinder on. Rotate the wheel by hand once or twice.
Now inspect the bevel:
- If the ink is removed evenly across the whole bevel, your grinder is already set to the correct angle.
- If only the cutting edge loses ink, your grinding angle is too steep.
- If only the heel of the bevel loses ink, your grinding angle is too shallow.
This method is excellent for setting up jigs and is one I regularly demonstrate during my sharpening clinic because it gives instant visual feedback.
Use a Digital Angle Gauge
If you enjoy accuracy or frequently adjust your sharpening setup, a digital angle gauge is another excellent option. These small magnetic devices can measure the angle of your grinder’s tool rest or jig to within a fraction of a degree.
Although not essential, they’re popular with turners who like to record and reproduce exact settings for different tools.
Remember: Consistency Matters Most
It’s easy to become focused on finding the “perfect” angle, but in practice, being consistent is far more important than chasing an exact number. A bowl gouge sharpened repeatedly at 50° will almost always perform better than one that’s 48° one week, 56° the next and 52° after that.
Choose an angle that suits your style of turning, record it, and reproduce it every time. That’s the real secret to successful sharpening.
Freehand or Jigs?
There’s often debate about this.
Experienced turners can sharpen freehand extremely well.
However, for most people, jigs dramatically shorten the learning curve.
They allow you to:
- sharpen faster
- reproduce identical bevels
- avoid accidentally changing your tool profile
- spend more time turning and less time grinding
Consistency wins every time.
Do You Need an Expensive Sharpening System?
Not at all.
There are several excellent ways to sharpen woodturning tools depending on your experience and budget.
Budget Option: Bench Grinder
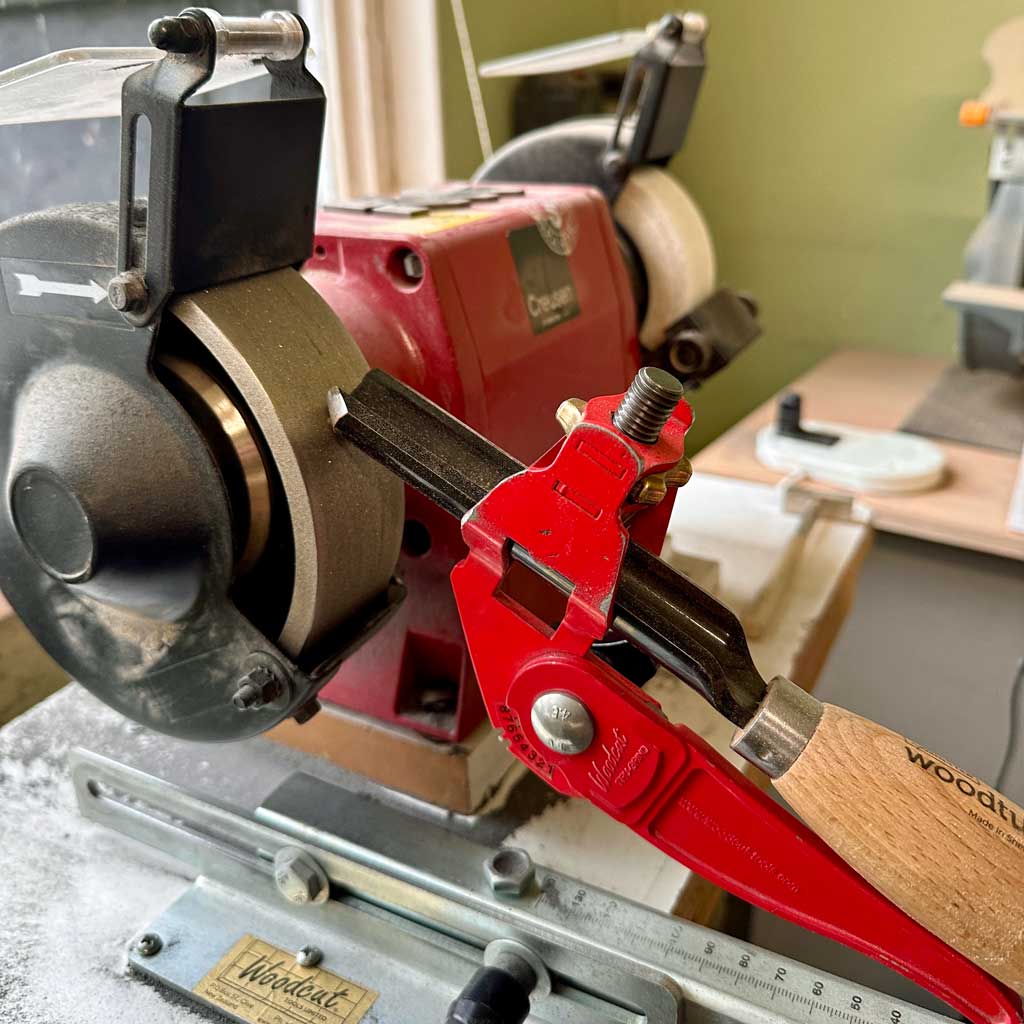
For many hobby woodturners, a standard slow-speed bench grinder, fitted with aluminium oxide wheels and adjustable table, offers excellent value.
Choosing an Aluminium Oxide Grinding Wheel
What Is an Aluminium Oxide Wheel?
Most bench grinders are supplied with aluminium oxide grinding wheels, making them the most popular and affordable choice for woodturners. Aluminium oxide is a durable abrasive that cuts high-speed steel (HSS) efficiently and is available in a range of grits. For most woodturners, a 120-grit wheel is ideal for routine sharpening, while a 60–80 grit wheel is useful for reshaping damaged tools or creating a new profile.
Choosing the Right Wheel Width
If your grinder can accommodate them, choose a 40 mm (1½”) wide wheel rather than the more common 25 mm (1″) version. The wider surface provides better support for bowl gouges, skews and other turning tools, making sharpening easier and more consistent.
Looking After Your Grinding Wheel
Aluminium oxide wheels gradually wear as they are used, so they require regular maintenance. Dressing the wheel with a diamond dresser removes embedded metal particles, restores the abrasive surface and keeps the wheel flat and round. This helps it cut efficiently, reduces vibration and maintains a smooth grinding action. As the wheel wears, its diameter becomes smaller, so you may need to adjust your jig settings to maintain the correct sharpening angle.
When Should You Replace a Grinding Wheel?
Grinding wheels have a finite lifespan and should be replaced if they become badly worn, chipped, cracked or damaged. Using a damaged wheel can be extremely dangerous because it may fail or shatter while rotating at high speed. Before fitting a new wheel, carry out a simple ring test by gently tapping it with a non-metallic object. A clear, bell-like ring indicates the wheel is sound, while a dull thud may indicate a crack and the wheel should not be used. Taking a few moments to inspect your grinding wheel before use is an important part of safe sharpening.
This structure is also better for SEO because each subheading contains words people actually search for, such as aluminium oxide wheel, wheel width, grinding wheel maintenance, and replace a grinding wheel.
Mid-Range Option: Grinder with Jigs
Adding a jig system transforms a basic grinder.
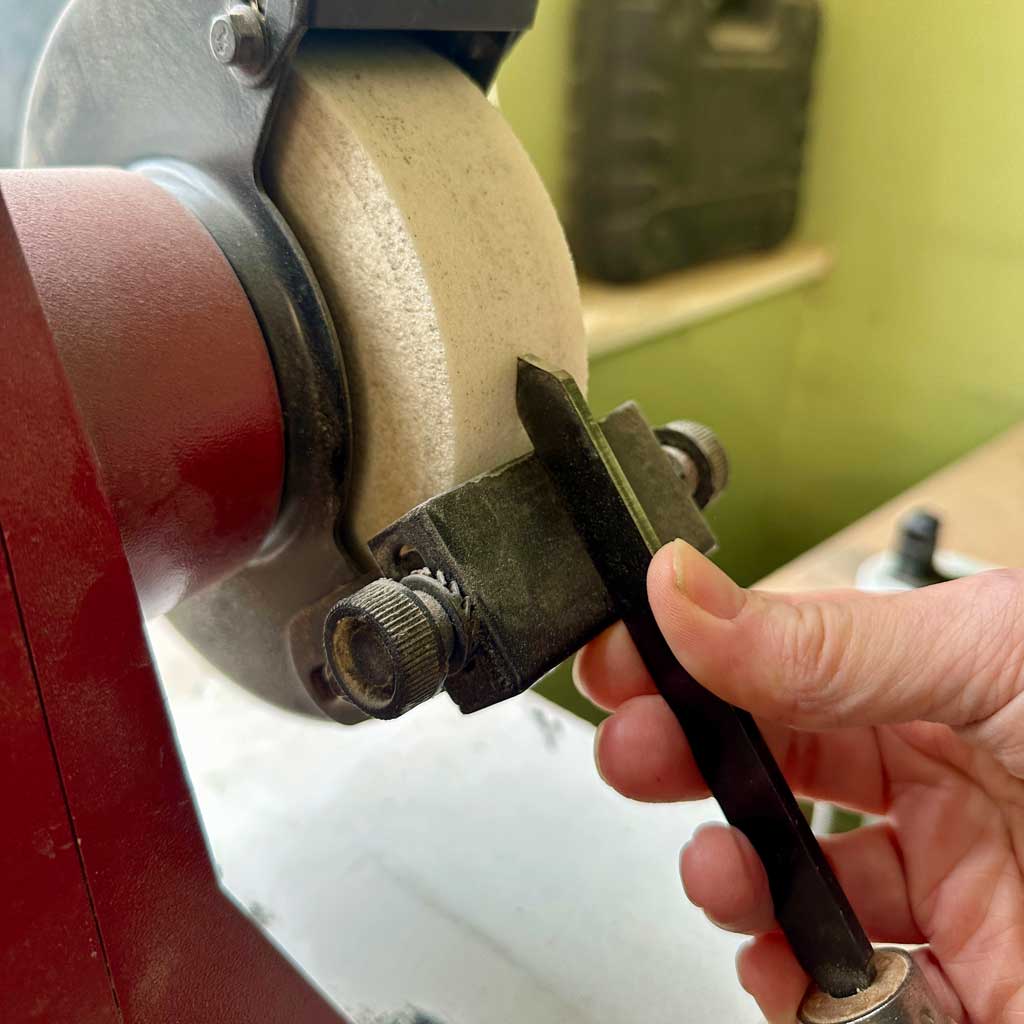
Jigs help you reproduce exactly the same bevel every time, making sharpening quicker and far more consistent. They’re especially helpful for bowl gouges and spindle gouges, where maintaining a symmetrical profile is important.
Most jig systems work on the same principle. They control the position of the tool in relation to the grinding wheel so that every variable remains the same. First, set the tool projection (how far the tool extends from the jig). Next, adjust the jig angle and the support arm. Once these settings are fixed, the jig guides the tool through exactly the same movement every time you sharpen. This ensures the bevel angle, wing profile and overall shape remain consistent, even after dozens of sharpening sessions. Rather than trying to judge the angle by eye, the jig removes much of the guesswork, allowing you to produce a repeatable grind in just a few seconds. This consistency not only improves the way your tools cut but also helps develop muscle memory, as the tool behaves the same way each time you return to the lathe.
This is the setup many experienced club turners and tutors recommend because it offers an excellent balance between cost, speed and repeatability.
Popular Sharpening Jig Systems
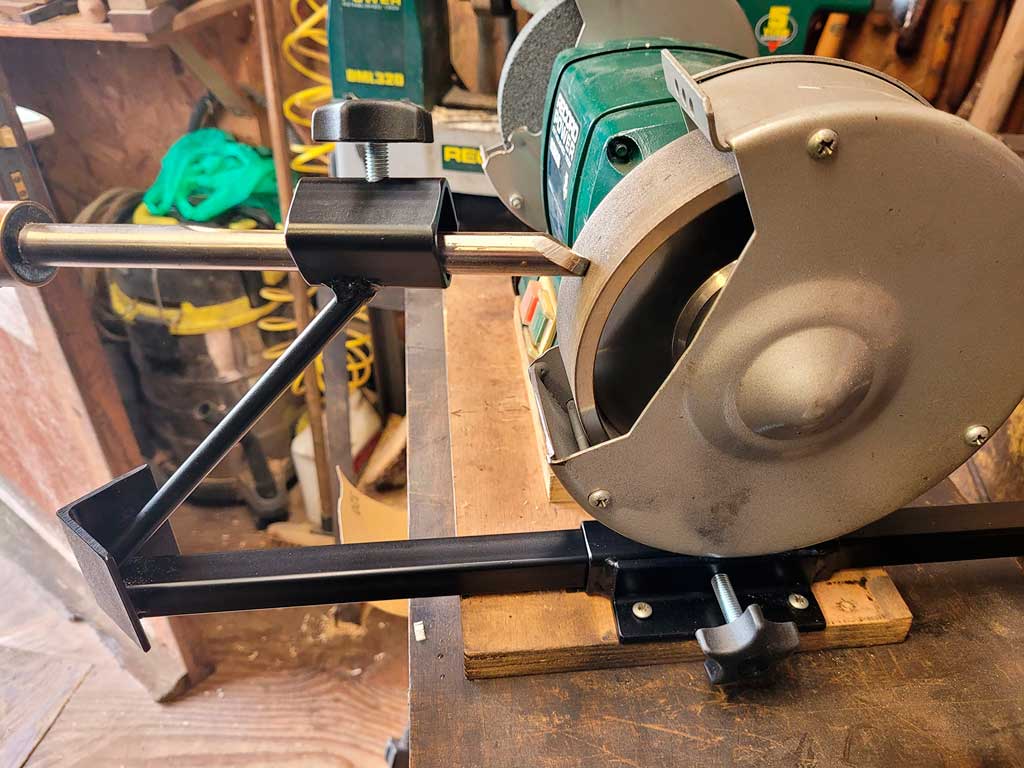
Several manufacturers produce high-quality sharpening jig systems for woodturning, each with its own strengths. Oneway is widely regarded as the benchmark, with its Wolverine Sharpening System and Vari-Grind jig used by many professional turners around the world. Robert Sorby offers the ProEdge sharpening system, which uses abrasive belts rather than grinding wheels and is popular for its versatility and ease of use. Tormek produces a comprehensive range of jigs for its water-cooled sharpening systems, allowing repeatable sharpening of virtually every woodturning tool. Axminster Tools also manufactures an excellent range of sharpening jigs and accessories that are compatible with many bench grinders and represent good value for money. Rutlands has become another popular choice, offering well-designed bench grinder sharpening jigs that provide precise, repeatable results at a very competitive price, making them an excellent value-for-money option for hobbyists and improving turners.
Whichever system you choose, the most important factor is consistency. Once you’ve set up a jig to suit your preferred bevel angles, it allows you to reproduce the same grind quickly and accurately every time, helping you spend less time sharpening and more time turning.
Considering a CBN Wheel?
If you’re investing in a grinder and jig system, it’s worth considering upgrading from a traditional aluminium oxide wheel to a CBN (Cubic Boron Nitride) wheel. CBN is an extremely hard synthetic abrasive that’s electroplated onto a precision-machined steel wheel. Unlike conventional grinding wheels, CBN wheels don’t wear out of shape, so they maintain a perfectly flat surface and consistent diameter throughout their life. This means your jig settings remain accurate and you don’t need to readjust them as the wheel wears down.
CBN wheels also run cooler, reducing the risk of overheating the cutting edge, and they produce a very clean, smooth grind with minimal vibration. While they cost significantly more than aluminium oxide wheels, many woodturners find they’re a worthwhile long-term investment because they require almost no maintenance.
There’s no need for regular dressing or truing, and they won’t gradually become smaller in diameter. Simply brush away metal dust occasionally to prevent build-up and, if necessary, use a rust inhibitor on the steel body if your workshop is damp.
In contrast, aluminium oxide wheels are much cheaper to buy but need regular dressing to keep the surface clean, flat and cutting efficiently, and they slowly wear away over time, altering your sharpening geometry.
For most beginners an aluminium oxide wheel offers excellent value, but if you sharpen frequently and want maximum consistency with minimal maintenance, a CBN wheel is an excellent upgrade.
Premium Option: Water-Cooled Sharpening Systems
The Benefits of Wet Sharpening
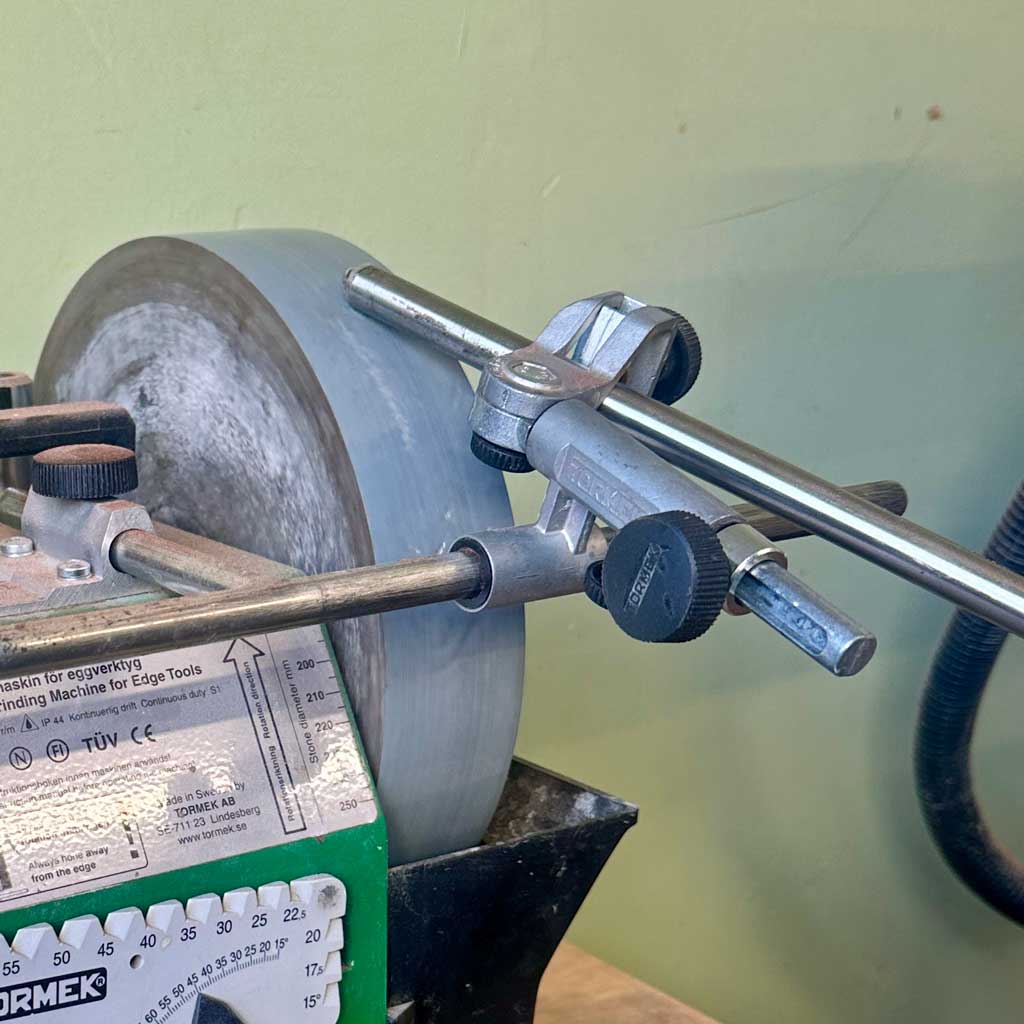
Water-cooled sharpening systems, such as the Tormek, are popular because they sharpen slowly while keeping the tool cool throughout the grinding process. The constant flow of water virtually eliminates the risk of overheating the cutting edge, helping preserve the hardness (temper) of the steel.
Wet sharpening also removes metal more gradually, making it easier to achieve a precise, controlled edge. This is particularly useful for expensive high-speed steel tools and delicate profiles such as skews.
Many systems also include a leather honing wheel that removes the burr after grinding and refines the edge to an exceptionally sharp finish.
Although water-cooled systems are slower and more expensive than a conventional bench grinder, many turners appreciate their accuracy, repeatability and ease of use.
Which Sharpening System Is Right for You?
There isn’t a single “best” sharpening system—only the one that best suits your budget, experience and how often you sharpen. For many woodturners, a slow-speed bench grinder fitted with a 120-grit aluminium oxide wheel and a good jig system offers the best balance of cost, speed and repeatability. As your skills develop and your budget allows, upgrading to a CBN wheel can reduce maintenance and improve consistency. A water-cooled sharpening system is an excellent investment for those who prioritise precision or regularly sharpen a wide variety of woodworking tools, but for most woodturners it complements rather than replaces a bench grinder, particularly when significant reshaping is required.
The best sharpening system depends on your budget, experience and how often you sharpen. The comparison below summarises the strengths of each option to help you choose the setup that’s right for you.
| Sharpening System | Approx. Cost | Ease of Use | Maintenance | Sharpening Speed | Consistency | Best For | Pros | Cons |
|---|---|---|---|---|---|---|---|---|
| Bench Grinder + Aluminium Oxide Wheels | £ | Moderate | High | Fast | Good (with practice) | Beginners and hobbyists on a budget | Low purchase cost, widely available, quick to sharpen, ideal for learning | Wheel wears over time, requires dressing, diameter reduces with use, greater risk of overheating if used incorrectly |
| Bench Grinder + Jigs + Aluminium Oxide Wheels | ££ | Easy | High | Fast | Excellent | Beginners, improving turners and clubs | Repeatable results, easier to learn, consistent bevel angles, excellent value for money | Grinding wheel still requires dressing and eventual replacement |
| Bench Grinder + CBN Wheel + Jigs | £££ | Very Easy | Very Low | Very Fast | Excellent | Regular and experienced woodturners | No dressing required, wheel never changes diameter, runs cooler, smooth grinding, highly repeatable | Higher initial purchase price |
| Water-Cooled Sharpening System | ££££ | Easy | Low | Slow | Excellent | Turners who prioritise precision or sharpen a wide range of tools | Virtually eliminates overheating, produces an exceptionally refined edge, excellent range of jigs, ideal for sharpening many different edge tools | Expensive, slower to remove material, less efficient for reshaping damaged tools |
Common Sharpening Mistakes
Almost everyone makes these mistakes when learning:
- Pressing too hard against the wheel.
- Grinding until the edge overheats.
- Changing the bevel angle every time.
- Grinding away more steel than necessary.
- Trying to sharpen freehand before developing consistency.
The aim isn’t perfection.
It’s repeatability.
Why I Teach Sharpening Early
At Love Heartwood Turning School, sharpening is introduced early because it underpins everything else you’ll learn.
When students experience how a properly sharpened tool behaves, turning immediately becomes more enjoyable. Cuts become cleaner, confidence grows and catches reduce dramatically.
It’s often the point where woodturning starts to feel natural rather than frustrating.
Visit the Love Heartwood Sharpening Clinic
If sharpening feels confusing, you’re certainly not alone.
My 2-hour Woodturning Tool Sharpening Clinic is designed to take the mystery out of sharpening and give you the confidence to maintain your own tools.
During the session you’ll:
- understand why different bevel angles matter
- learn how to sharpen the most common woodturning tools
- compare grinder-and-jig systems with water-cooled sharpening systems
- discover when each system is most appropriate
- learn how often to sharpen during turning
- understand common sharpening mistakes and how to avoid them
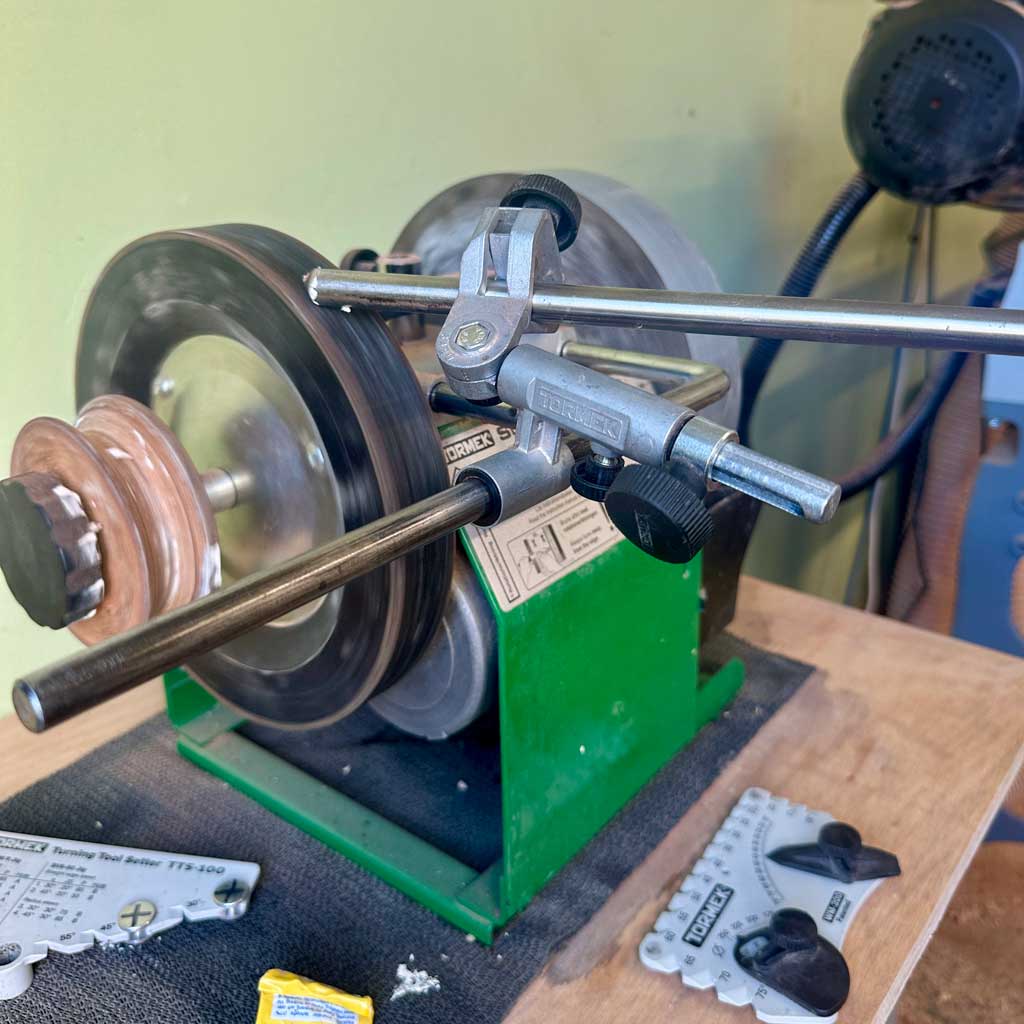
You’ll also have the opportunity to ask questions about your own tools and sharpening setup, making the advice directly relevant to your workshop. The clinic includes demonstrations using both a grinder with jigs and a Tormek-style water-cooled sharpening system.
Whether you’re buying your first grinder or looking to improve your sharpening technique, the clinic is designed to help you spend less time struggling at the grinder and more time enjoying woodturning.


Woodturning Tool Sharpening Clinic | Hands-On Skills Session
Learn how to sharpen woodturning tools properly in this focused, hands-on sharpening clinic. Covering the fundamentals of grinding, bevel angles and tool profiles. This session will help you achieve sharper tools, cleaner cuts and more confident turning. Bring your own tools for guidance and practical sharpening advice.
To enable us to craft in harmony with nature, a tree is planted for every course attendee with Ecologi.
Gift vouchers are available.
FAQ’s
How often should I sharpen my woodturning tools?
There’s no fixed rule, as it depends on the timber and the type of cut you’re making. As a guide, sharpen a bowl gouge every 10–20 minutes of turning and a spindle gouge every 15–30 minutes. If the tool starts producing dust instead of clean shavings, needs more force or leaves a rougher surface, it’s time to sharpen.
What is the best grinder for sharpening woodturning tools?
A slow-speed bench grinder fitted with a quality 120-grit aluminium oxide or CBN wheel is an excellent choice for most woodturners. Pairing it with a jig system makes sharpening faster, more accurate and highly repeatable.
Are CBN wheels better than aluminium oxide wheels?
Both have their advantages. Aluminium oxide wheels are affordable and ideal for most hobby turners but require regular dressing as they wear. CBN wheels cost more but maintain their shape, run cooler, require very little maintenance and produce highly consistent results.
Should I sharpen freehand or use a jig?
Many experienced turners sharpen freehand, but a jig is usually the best option for beginners and improving turners. It helps you maintain consistent bevel angles and tool profiles, making sharpening quicker and more repeatable.
Can you sharpen woodturning tools with a Tormek?
Yes. A Tormek water-cooled sharpening system is an excellent choice, particularly if you value precision and want to minimise the risk of overheating the cutting edge. It’s slower than a bench grinder but produces an exceptionally refined edge.
What angle should I sharpen my bowl gouge?
Most bowl gouges are sharpened between 45° and 60°, depending on the type of grind and the work being carried out. A traditional short grind is often recommended for beginners because it’s easier to control, while a long or swept-back grind offers greater versatility for experienced turners.
Why do my woodturning tools go blunt so quickly?
All cutting tools become dull with use, especially when turning abrasive timbers or wood containing bark, dirt or silica. Frequent, light sharpening is normal and removes very little steel. Waiting until a tool is completely blunt usually means more grinding and poorer cutting performance.
Is sharpening difficult to learn?
Not at all. Like any woodturning skill, it becomes much easier once you understand the principles and have a repeatable system. With the right equipment and a little practice, most turners become confident at sharpening very quickly.